
Please note that administering your site is better done on a non-mobile (desktop) device.
See a video on how to use 1mme on youtube
When you log in as admin, you come to the Site Manager where you will see a toolbox on the left, and your site on the right.
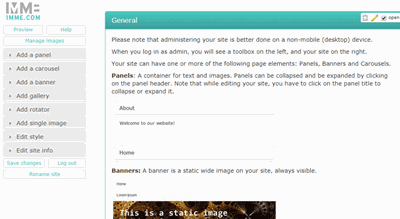
Your site can have one or more of the following page elements: Panels, Banners and Carousels.
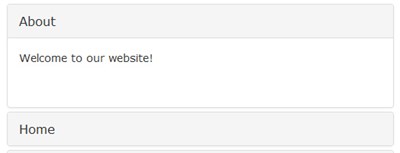
Panels: A container for text, images and videos. Panels can be collapsed and be expanded by clicking on the panel header. Note that while editing your site, you have to click on the panel title to collapse or expand it.
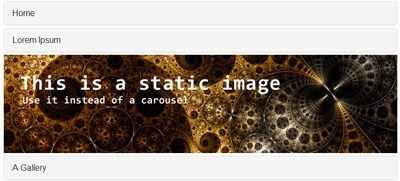
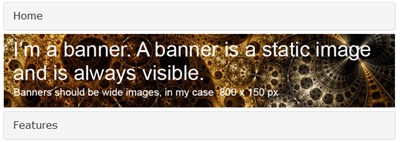
Banners: A banner is a static wide image on your site, always visible and takes the full width of the page.
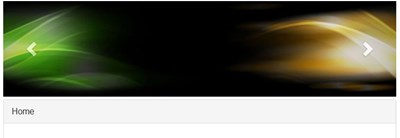
Carousels: A carousel, a series of wide images flying in from the right, always visible and takes the full width of your page.
Drag and drop page elements on your site or delete them. All changes will be made permanent (including delete actions) when you click the button 'save changes'
Panels
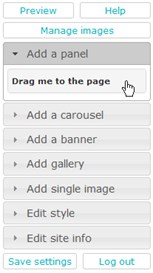
Add a panel. A panel is a collapsible pane which can contain text, images and image collections.
Click on 'Add a panel' from the site manager toolbox, and drag and drop the panel on your page.
A small toolbox will be visible on the right of the panel header:

Click on the garbage bin to delete the panel and its content.
Click on the pencil to edit the panel title.
Check the 'open' checkbox if you want this panel to be open when a visitor comes to your website (as opposed to collapsed).
Show animation
Banners
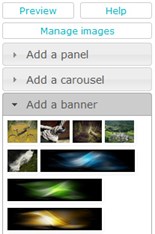
A banner is a static image on your site, always visible and taking the full width of the page. Click on 'Add a banner' from the site manager toolbox, and drag and drop the banner on your page. Banners should be wide images, at least 720 pixels wide and will be cropped to a maximum of a 200 pixels height.
Show animation
Carousel
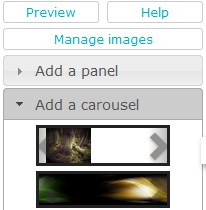
Add a carousel, a series of wide images flying in from the right, always visible and taking the full width of the page. Click on 'Add a carousel' from the Site Manager toolbox, and drag the carousel on your page. Note that only image records with more then one image can be used as a carousel. Carousel images should be wide images, at least 720 pixels wide and will be cropped to a maximum of 200 pixels height. The final carousel hight will be the height of the least tall image in that record.

Show animation
You can invoke the text editor by double-clicking somewhere on the text (not on images though). The editor toolbar will show up. Hovering over the site manager again, will make the editor disapear.
For editing content, there is powerful editor available which will enable you to use rich mark-up like allignment, tables and colors.
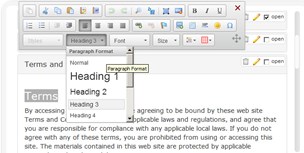
Hovering over the toolbar buttons will show a tool-tip to explain what a certain button does.
Please note that it is a bad idea to paste text straight from a word processor into the text area. Your site will become unnecessary heavy, and it might even break your site. Paste it as plain text and do the mark-up using the editor tools.
Show animation
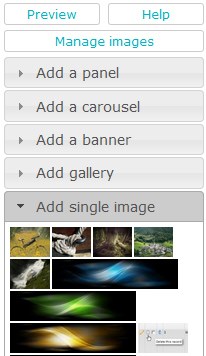
Adding images and videos
Add an image to your text by clicking on 'Add a single image'.
Select an image and drop it into your text. When you drop it in the left part of your content, the image will float left; with other words, the text will flow around it on the right. Similar if you drop it in the right part, the image will float right and the text will flow around it on the left.
Drop it somewhere in the middle for a non-floating image.
You can later drag and drop it in another part of your text, as long as it is in the same panel.
Show animation.
Galleries
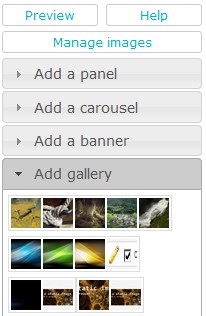
Add an image gallery to your text. Click on 'Add a gallery' from the site manager toolbox, and drag the gallery into your text.
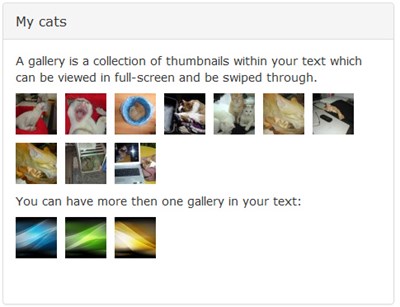
Show animation
See it in action here:








If you have an image record with images of the same size, you can drag this as a rotator (alternating images in a frame) in your text.
Before you can use images or videos in your website, they need to be uploaded to the web first. The Media Manager lets you do that.
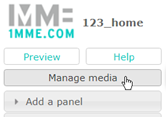
Note that, unlike any other changes to your site, where nothing is permanent until you save your changes, adding and deleting images is done instantaneously.
So it is a good habit to organize your pictures locally, so that in case of a mishap, you know were to find a deleted one.
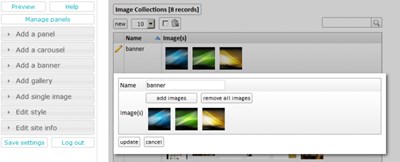
Media are organized in records. Records can contain a single image or video, or multiple images or videos. Records with multiple images (collections) can be used as a carousel or as a gallery, and if they are all of the same size, as a rotating image.
Uploading images and videos
You can upload images and videos from your device to the web by either editing an existing collection (record) or by creating a new one. You will be able to select multiple images or videos on your device.
Because videos tend to be large, and the maximum upload size of media is 10Mb, there is another way to include videos / YouTube videos in your site. See 'Note on videos' below.
Add record
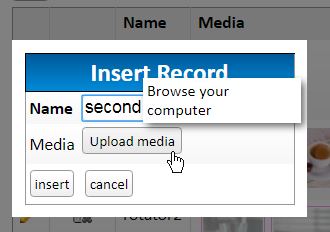
You can add a record simply by clicking on the 'new' button.
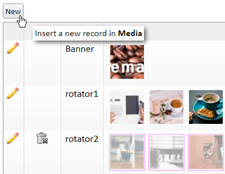
In the following dialog, give a name to this record and choose 'upload media' and choose images or videos from your device.
Delete record
You can only delete a whole record if none of the media in that record is used on your website. You can do so by clicking on the garbage bin. Unused media have a red outline. You can see where an image is used by hovering your cursor over an image. It is still possible to delete an individual unused media by entering edit-mode (see below).
Editing a record
You can edit a record by clicking on the pencil icon.
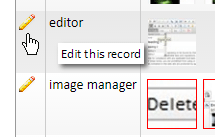
You can add or delete individual media in a collection and drag them around to change the order. Click on the pencil icon to enter the edit mode.
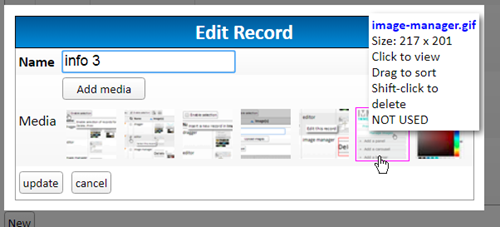
You can now upload (multiple) images or videos to this record, or remove them if they are not used, or drag them to change the order. To delete an unused media, shift-click on the image.
Note on videos
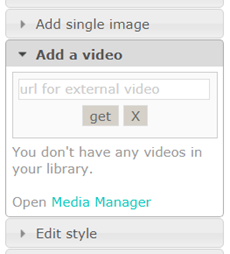
You can ad external videos to your site without uploading them to the media manager. This will circumvent the upload maximum size, but it means that those videos must exist somewhere on the web.
Youtube / Vimeo videos can be included as well. Just copy and paste the embed the complete code in the input field.
<iframe width='560' height='315' src='https://www.youtube.com/embed/XqICpV_NHio' frameborder='0' allow='accelerometer; autoplay; encrypted-media; gyroscope; picture-in-picture' allowfullscreen></iframe>
Below are some links to public test videos, to get a feel for it.
- https://commondatastorage.googleapis.com/gtv-videos-bucket/sample/BigBuckBunny.mp4
- https://commondatastorage.googleapis.com/gtv-videos-bucket/sample/ElephantsDream.mp4
- https://commondatastorage.googleapis.com/gtv-videos-bucket/sample/ForBiggerBlazes.mp4
- https://commondatastorage.googleapis.com/gtv-videos-bucket/sample/ForBiggerEscapes.mp4
- https://commondatastorage.googleapis.com/gtv-videos-bucket/sample/ForBiggerFun.mp4
- https://commondatastorage.googleapis.com/gtv-videos-bucket/sample/ForBiggerJoyrides.mp4
- https://commondatastorage.googleapis.com/gtv-videos-bucket/sample/ForBiggerMeltdowns.mp4
- https://commondatastorage.googleapis.com/gtv-videos-bucket/sample/Sintel.mp4
- https://commondatastorage.googleapis.com/gtv-videos-bucket/sample/SubaruOutbackOnStreetAndDirt.mp4
- https://commondatastorage.googleapis.com/gtv-videos-bucket/sample/TearsOfSteel.mp4
- https://commondatastorage.googleapis.com/gtv-videos-bucket/sample/VolkswagenGTIReview.mp4
- https://commondatastorage.googleapis.com/gtv-videos-bucket/sample/WeAreGoingOnBullrun.mp4
- https://commondatastorage.googleapis.com/gtv-videos-bucket/sample/WhatCarCanYouGetForAGrand.mp4
Big Buck Bunny
The 'Edit style' section allows you to personalize your website as in colors and general appearance.
Note the 'undo' and 'redo' buttons. They might be your biggest friend.
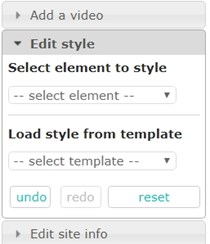
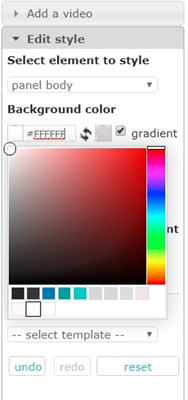
Select element to style
You can select an element to style by either selecting an element from the drop-down list, or by clicking on the element in the document.
Changing the style of an element type is by default 'global', with other words, changing something here has effect on all other elements of the same type in your document.
You can style individual elements as well by clicking on an element and checking the checkbox 'use local style'.
Local styles overrule global styles.
Load colors from template
Use predefined colors. Choose 'default' to revert the style to the state when your site was created.
Undo
Undo erases the last change done to the style settings reverting it to a previous state.
Redo
Redo the last undo
Reset
Loads your last saved settings, undoing all style changes since your last saved settings.
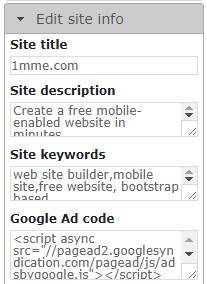
Click on 'Edit site info' in the site manager toolbox to change metadata of your site. All fields are optional.
Site title
The title defines a title in the browser toolbar. It defaults to your site's name. It also provides a title for the page when it is added to favorites.
Site description
This should provide a short description of the page. In some situations this description is used as a part of the snippet shown in the search results.
Site keywords
Keywords may tell search engines what the topic of the page is. Most of the search engines don't use them, they have a negligible SEO value and don't influence a website's position in search engine results.
Make money with your website by placing a Google ad on your site.
1) Go to Google Adsense and create an ad. Do not choose 'responsive', as it takes way too much space on your page and has known issues with 1mme.
Choose 'Display Ad' and for size 'fixed' with 728 x 90 as dimensions.
Create a second ad with dimensions 320 x 90.
Copy the code provided.
2) Go to the admin section of your site and open 'Scripts' tab and paste the code in the boxes 'Google Ad Code'
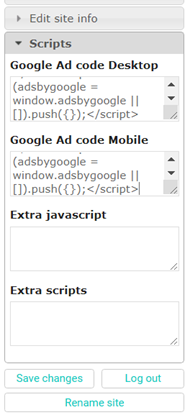
3) Now a new item appears in the menu: 'Add Google ad'. Open this menu-item and simply drag an ad placeholder as a page element to your site.
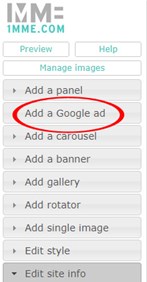
While your are editing your site, you will only see this placeholder. On your live-site, it will be an advertisement.

Save changes
Save your current text, layout and settings. Changes will be immediate visible on the World Wide Web.

